Monday, February 20, 2012

Home At Last - 2nd in a Series

Home At Last 2

         If you asked my daughters what the first thing is I do when moving into a new residence, there would be no hesitation to their answer -  I paint the closets.  It doesn’t matter if I am purchasing a home or renting, I have to paint the closets.  When people paint rooms they generally do not take the time to paint the closets.  If you look closely you will see the walls are dirty and dingy and probably not the same color as the room.  I want the closets to be clean and fresh before I start putting my belongings away! 
     Since I haven’t decided on a color scheme for the entire house yet I chose a basic tan color for the closets.  (More than likely, when I finally paint the room I will repaint the closet the same color.)  I chose a paint called “Lucite” because it was the cheapest on the shelf.  (I try not to use the word cheap I prefer least expensive but in this case cheap describes it best.)  I asked myself “why should I purchase a premium paint for the closet?”  Once I got the paint home and opened the can my question was answered.  First of all the Lucite paint had a terrible odor which took  several days to dissipate.  Second, it is very thin.  To answer my own question, always purchase a premium paint for your projects - you will have much better results. 
     A week later I was driving past a Sherwin Williams paint store and there was a sign outside that said “40% off”.  I went home and picked up the color sample for the bedroom and purchased Sherwin Williams paint.  I love Sherwin Williams!  They offer a great color palette, and their paint is just the right thickness and covers beautifully.  I have promised myself never to buy another cheap gallon of paint.  A premium paint is worth every penny you spend. 
    Visit the Sherwin Williams web page where you will find a lot of information to help you with all of your painting projects.  Sherwin-Williams: Global Gateway 

Tuesday, January 24, 2012

Home At Last - 1st in a Series


HOME AT LAST
     Since 2006 I have been living in vacant homes that were for sale staging them with my own belongings.  To tell you the truth I am not sure how many homes I have even lived in during those years.  The shortest amount of time I lived in a home was 45 days and the longest about nine months.  I am happy to report that now I have a permanent residence.  It is only 860 square feet so it will take a lot of organization to make it work.
     Despite it’s small size the home has a charming fireplace, a sunroom and a fenced in backyard, all things I had on my wish list for the home of my dreams.  There is a lot of garden space that has been neglected and it will be interesting to see what plants pop up in the Spring. 
 
“A good home must be made, not bought.”  Joyce Maynard

     This is a design philosophy that I adhere to.  Take your time making your design decisions when you move into a new residence.  You need to live in the space for a while to determine how it will be appropriate to your lifestyle.  These are the principles I will be following as I transform my own house into the home I envision it to be.  When you live in a small space it is important to make every inch count.  Every color, fabric and piece of furniture chosen will make a difference in the overall design.  Simple details will have a tremendous impact.  When you live in beautiful surroundings that meet the needs of your individual lifestyle you will feel more fulfillment in your life. 
     Follow my blog as I work through the process of re-modeling my space.          

Wednesday, November 9, 2011

Design Inspiration

I had the great pleasure of attending the “Design Chicago” conference at the Merchandise Mart in Chicago in October.  A trip to the Mart is always an inspirational event.  It doesn’t matter what your profession is everyone needs a shot of inspiration to help them look at what they’re doing in a creative, new way. 

Each year the Mart has what they call the “Dream Home”.  Nine designers are selected to design a room.  They push design concepts to the limits by using materials in a new way and selecting furniture and accessories that are new to the market.  It is not designed to flow like a model home but instead inspire your creative side.  Click here to take a look at it: Dream Home.
As I strolled through the showrooms I was stimulated by:
Scalamandre’ – beautiful fabrics

 Gorgeous foosball table by Maitland-Smith

Grange – a bookcase wall system with sliding shelves to hide a flat screen TV

Martin Wood – painted accent furniture

Baker – new designs by Barbara Barry
I ended the afternoon with a seminar by my friend and colleague Lee Russ, who spoke on “The Height of Luxury: The rise of Art Deco and Haute Couture”, reminding us that the people and events of an era create the design trends for that period of time. 
Attending such an event exposes me to the new trends in home furnishings and provides creative ideas to carry through with my own clients.   Above all it will help me look at each project from a new perspective.   

Thursday, October 6, 2011

Mock Roman Shade Construction

Are you ready to construct your window treatment?  Do you have a fabulous fabric to work with?  Lets get started.  
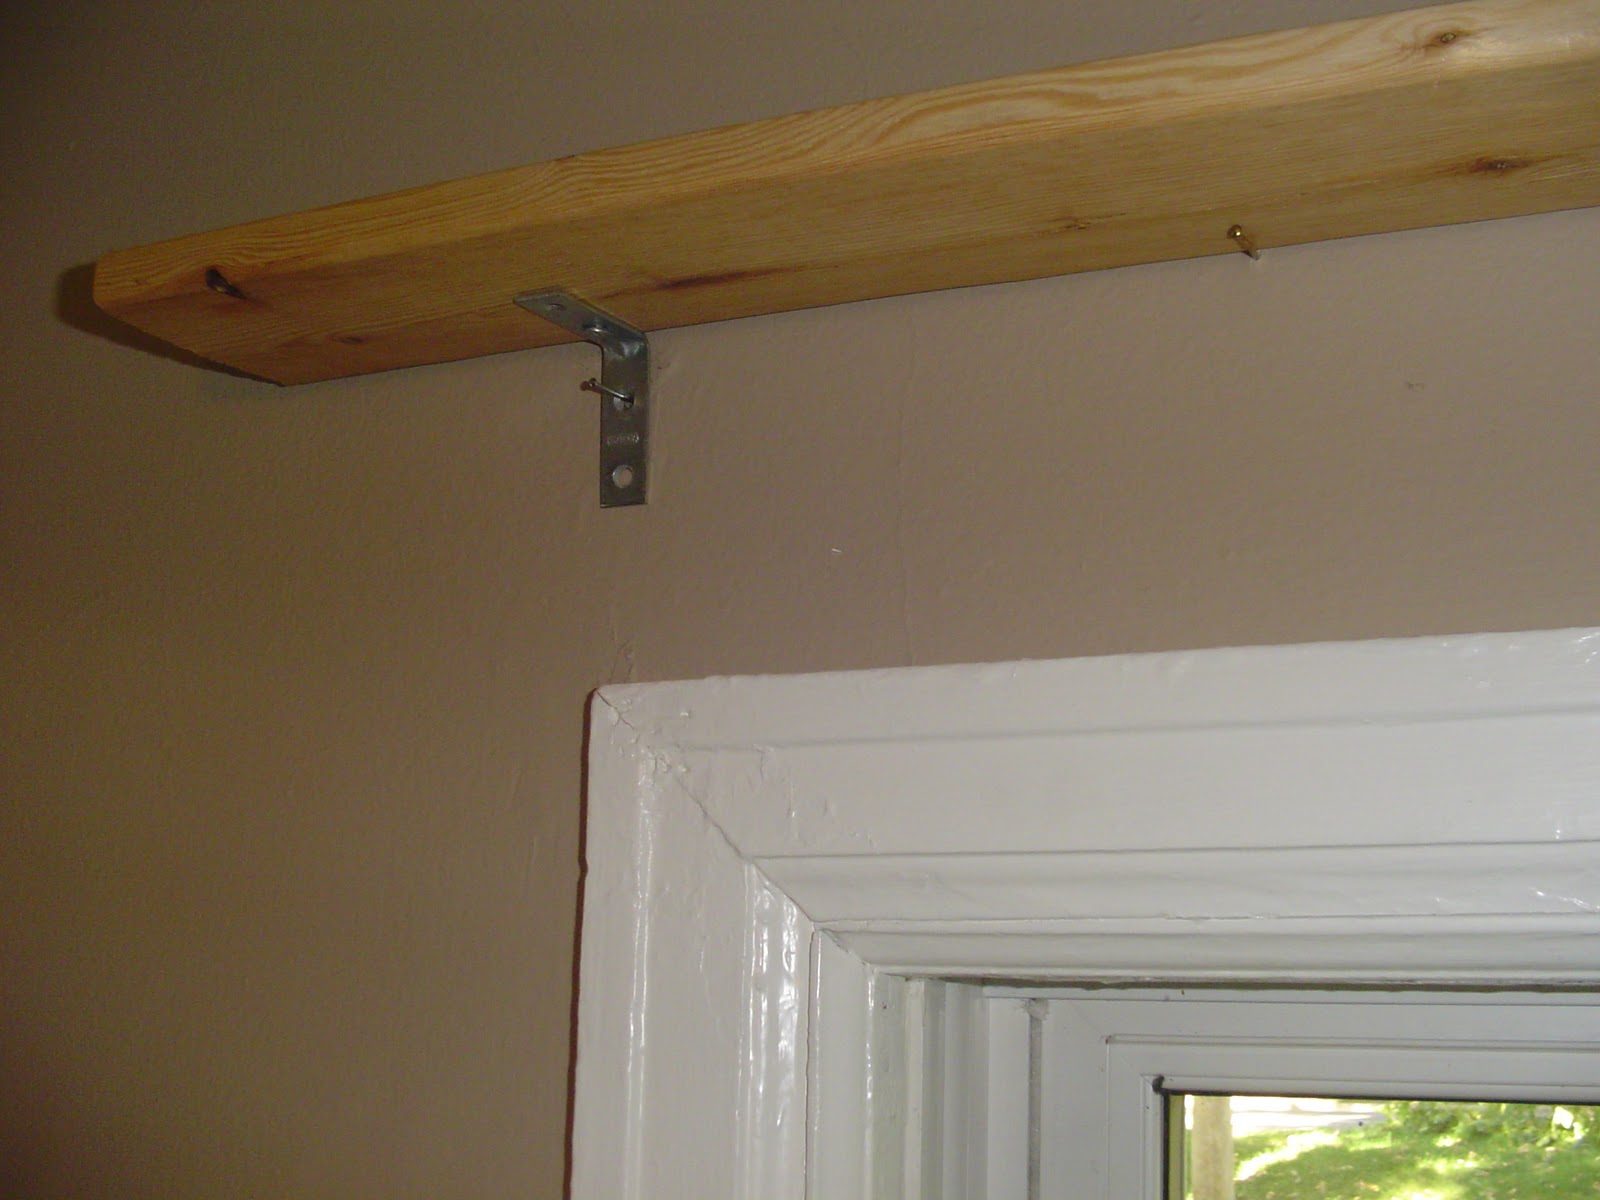
1.  Determine the width of the board.  It should be about 6" wider then the window frame.  3" will overlap on each side.  At this time you may also attach the "L" brackets.  
2.  Measure and cut the width of your fabric.  The width needs to include a seam allowance of 1/2" to 5/8", and enough fabric to wrap around the corner of the board.  
3.  Pin the face of the decorative fabric to the face of the lining fabric.  Sew the two pieces together at the sides and bottom edge.  Turn it right side out.
4.  Cut and sew contrasting ties.  They will be as long as the length of your shade and finished width will be about 2".  You will need 4 separate pieces. 
5.  Staple the raw edge of the fabric to the top of the board, and wrap the fabric around the edge of the board.  The ties will be attached at the same time, one tie is placed on the back side, one on the front side.  Depending on the width of your window, they will be 5" to 6" from the edge of the shade.  
6.  Now you are ready to mount the window treatment to the wall.  Remember when hanging any window treatment you want as much window exposed as possible.  The bottom edge of the Roman Shade should hide any type of blind or shade that is on the window when that blind is open.  
7.  Tie a knot with the contrasting ties, bunching up the fabric to your desired length.  Congratulations your window treatment is complete!!!
  The board is attached perpendicular to the wall, like a shelf, with the "L" brackets 
on the bottom.  Do not attach the board to the wall until the fabric has 
been stapled in place.    
The top of the board should look like this, with your fabric neatly wrapped
around the corner of the board.  

Wednesday, September 28, 2011

Impressive Window Treatment - Minimum Sewing!

The Mock Roman Shade is one of the easiest window treatments to create even for the person with limited sewing experience.  If you are able to sew a straight seam you will be able to make it.  Here is a list of items you will need:
1.  1" x 4" board.  The board will be mounted above the top window frame and should extend each side of the window by at least 3".  If you do not have a saw, have the board cut to size at the store.
2.  "L" brackets and screws.
3.  Staple gun.
4.  Face fabric, be daring use a bold print.  A window treatment is only as beautiful as the fabric that is selected.  One yard length is usually enough.
5.  Lining fabric, the same amount as your face fabric.
Go out and secure your supplies and next week we will talk about the construction.  Have fun choosing a fabric that will make a statement and really be impressive in your room! 

Sunday, July 24, 2011

Help, My Walls Are White!!!

 White Walls
 Fabric Inspiration

 Vital Yellow Walls

Sherwin Williams 6392

     Help, my walls are white, is a cry I hear often.  People always seem to be afraid of color and afraid of choosing the wrong color.  As a designer and home stager, entering a home with white walls is common.  I see homes that have been builder white for years.  
     Recently, I have been helping a client put together her new space after downsizing from a larger home.  The seller had painted the walls white so the first order of business was to choose paint colors.  
     Here is a side note to everyone who will be putting their home up for sale, do not paint your walls white.  Color on your walls will be a memory point for potential buyers.  There are a lot of homes on the market and buyers view many before they make a choice.  A buyer needs something to help them remember one space from another, wall color will help.  This is especially true in newer developments where the floor plans are all very similar. 
     Back to my project at hand.  As stated in a previous blog about painting, there always needs to be a reason for the color you choose.  In this case the paint color is a beautiful soft yellow that picks up the background color of the bedding.
     What makes a room interesting is the combination of color, pattern and texture.  Carry through the theme but do not over power a room by cluttering it with too much of the same thing.  The accessories you choose should make a statement.  We found the bird at a discount store and it picked up on all the colors found in the bedding.  You will have to wait to see the finished room, it is still a work in progress.        

Monday, June 27, 2011

Transforming Ordinary Into Fabulous


As a designer I can tell you that what brings life to any room is color, pattern and texture.  Without these three elements, used in the proper amount, a room is downright boring.  One can take an ordinary piece of furniture, such as this plain chair from IKEA, and make it fabulous!!!!  Find a fabric that speaks to you and use it on a chair, or a pillow on the sofa, a window treatment, or somewhere in the room where it will have an impact.  Just adding one new item to a room will have a tremendous impact.  Visitors will think you have re-done the entire room.  Don't you just love the color and movement of this fabric?